Splitting your API with routers
In the real world, it is almost impossible to keep all the logic in a single file.
Django Ninja provides a simple way to split your API into multiple modules using routers.
Suppose you have a Django project with the following structure:
├── myproject
│   └── settings.py
├── events/
│   ├── __init__.py
│   └── models.py
├── news/
│   ├── __init__.py
│   └── models.py
├── blogs/
│   ├── __init__.py
│   └── models.py
└── manage.py
To add an API to each Django application, create an api.py module in each application:
├── myproject
│   └── settings.py
├── events/
│   ├── __init__.py
│   ├── api.py
│   └── models.py
├── news/
│   ├── __init__.py
│   ├── api.py
│   └── models.py
├── blogs/
│   ├── __init__.py
│   ├── api.py
│   └── models.py
└── manage.py
Now let's add some operations to events/api.py. The trick is that instead of using the NinjaAPI class, you use the Router class:
from ninja import Router
from .models import Event

router = Router()

@router.get('/')
def list_events(request):
    return [
        {"id": e.id, "title": e.title}
        for e in Event.objects.all()
    ]

@router.get('/{event_id}')
def event_details(request, event_id: int):
    event = Event.objects.get(id=event_id)
    return {"title": event.title, "details": event.details}
Then do the same for the news app's news/api.py:
from ninja import Router
from .models import News

router = Router()

@router.get('/')
def list_news(request):
    ...

@router.get('/{news_id}')
def news_details(request, news_id: int):
    ...
blogs/api.py.
Finally, let's put it all together.
In your top-level project folder (next to urls.py), create another api.py file with a NinjaAPI instance:
├── myproject
│   ├── api.py
│   └── settings.py
├── events/
│   ...
├── news/
│   ...
├── blogs/
│   ...
It should look like this:
from ninja import NinjaAPI

api = NinjaAPI()
Now we import all the routers from the individual applications and include them into the main API instance:
from ninja import NinjaAPI
from events.api import router as events_router

api = NinjaAPI()

api.add_router("/events/", events_router)    # You can add a router as an object
api.add_router("/news/", "news.api.router")  #   or by Python path
api.add_router("/blogs/", "blogs.api.router")
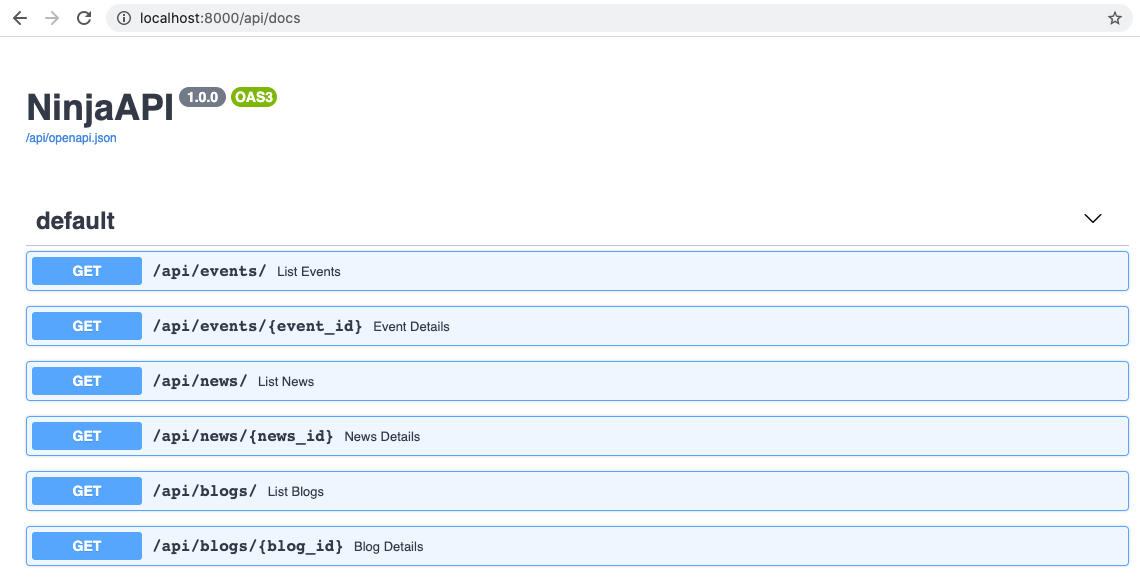
Now, add api to your URLs as usual and open your browser at /api/docs, you should see all your routers combined into a single API:
Router authentication
Use the auth argument to apply an authenticator to all operations declared in a router:
api.add_router("/events/", events_router, auth=BasicAuth())
Or using the router constructor
router = Router(auth=BasicAuth())
Router tags
You can use the tags argument to apply tags to all operations declared in a router:
api.add_router("/events/", events_router, tags=["events"])
Or using the router constructor
router = Router(tags=["events"])
Nested routers
Sometimes you also need to split the logic further.
Django Ninja lets you include a router inside another router any number of times, and finally include the top-level router into the main api instance.
Basically, this means you have add_router on both the api instance and the router instance:
from django.contrib import admin
from django.urls import path
from ninja import NinjaAPI, Router

api = NinjaAPI()

first_router = Router()
second_router = Router()
third_router = Router()


@api.get("/add")
def add(request, a: int, b: int):
    return {"result": a + b}


@first_router.get("/add")
def add(request, a: int, b: int):
    return {"result": a + b}


@second_router.get("/add")
def add(request, a: int, b: int):
    return {"result": a + b}


@third_router.get("/add")
def add(request, a: int, b: int):
    return {"result": a + b}


second_router.add_router("l3", third_router)
first_router.add_router("l2", second_router)
api.add_router("l1", first_router)

urlpatterns = [
    path("admin/", admin.site.urls),
    path("api/", api.urls),
]
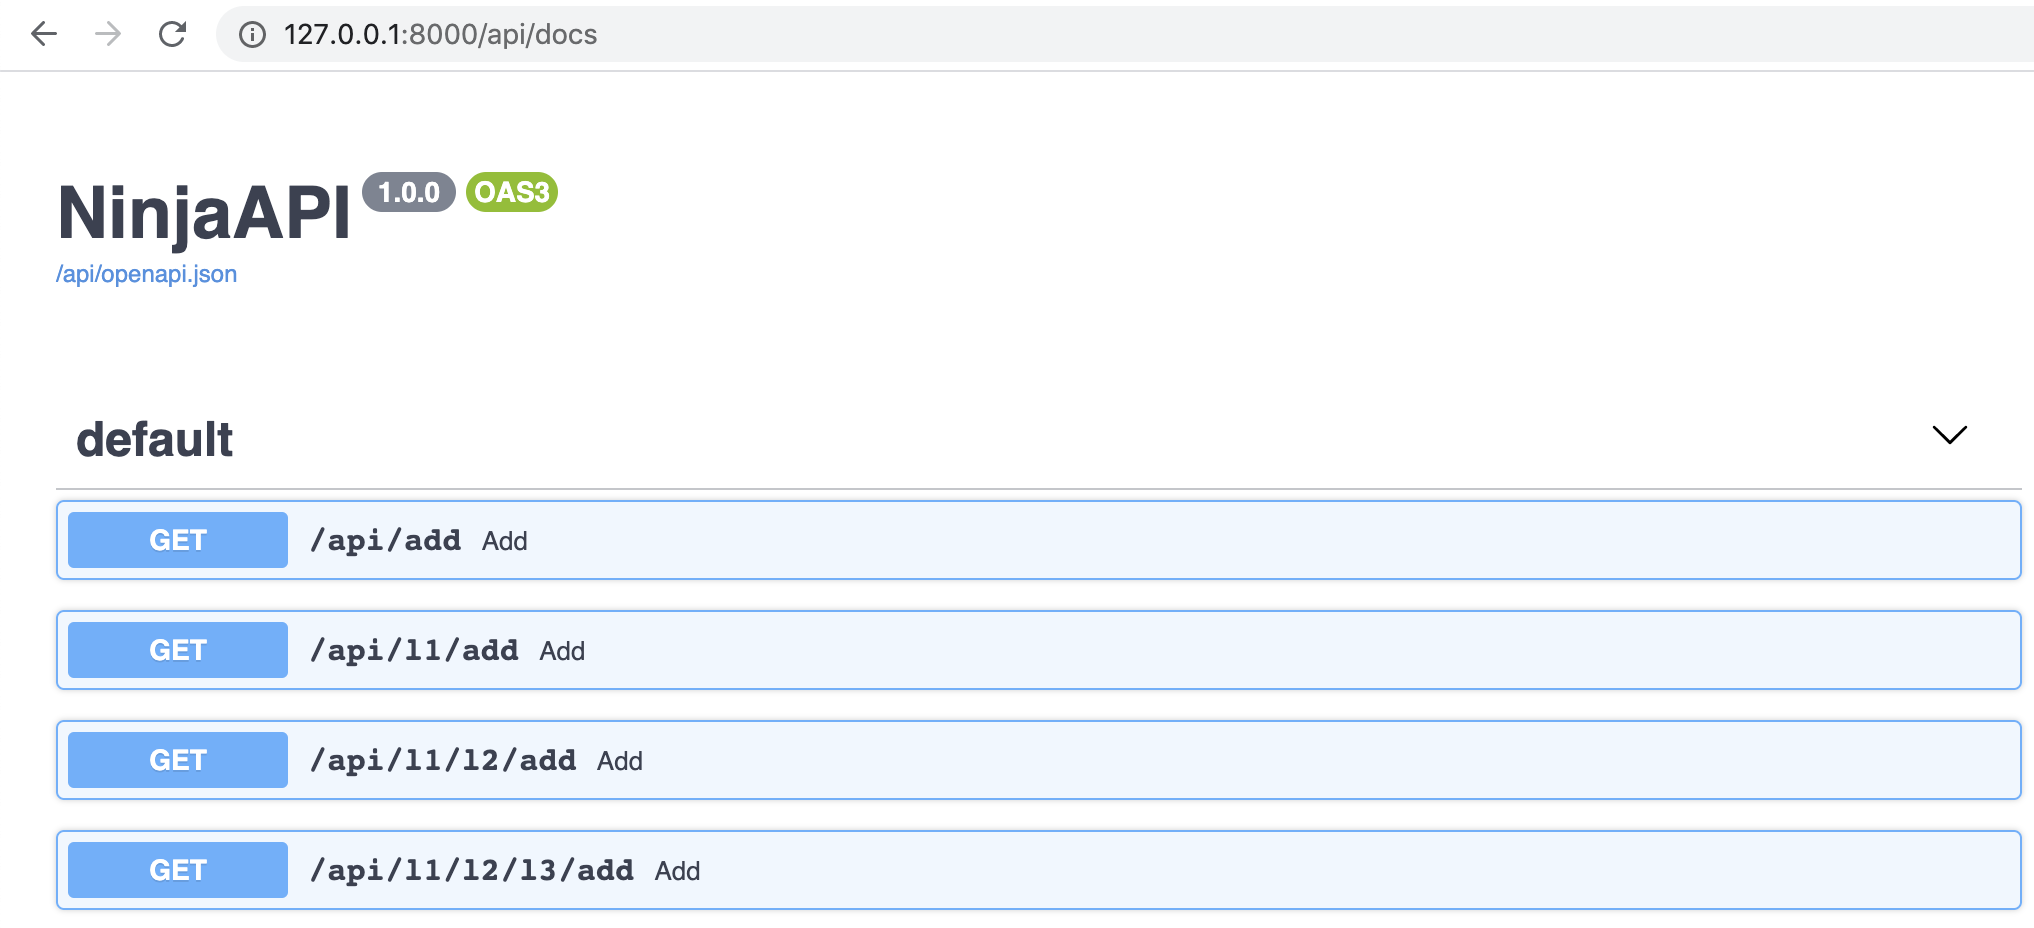
Now you have the following endpoints
/api/add
/api/l1/add
/api/l1/l2/add
/api/l1/l2/l3/add
Awesome! Now go check the auto-generated documentation:
Success
Continue to the next section Authentication

Comments
本文总阅读量次